
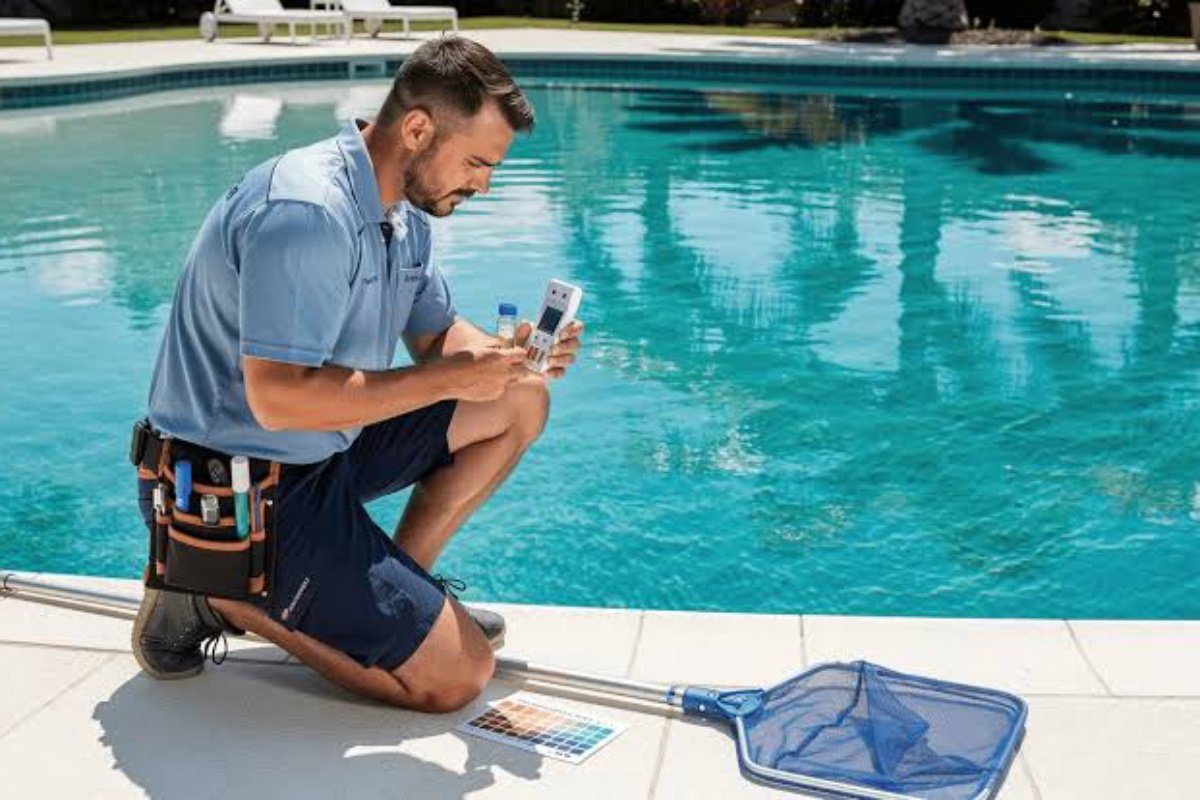
You've been paying a pool service company good money to keep your water sparkling. But instead of crystal clarity, you've got cloudy water, algae blooms, irritated eyes, or even equipment problems. Sound familiar?
You've been paying a pool service company good money to keep your water sparkling. But instead of crystal clarity, you've got cloudy water, algae blooms, irritated eyes, or even equipment problems. Sound familiar? Unfortunately, you're not alone. Not all pool services are created equal—and sometimes, you end up with a pool that's worse off than when you started.
The good news? You can fix it. In this guide, we'll walk you through exactly how to rebalance your pool after bad service, diagnose what went wrong, and get your water back to perfect condition—without relying on anyone else. And when you need the right products and expert guidance, poolblue.store is here to help you take back control.
Signs You've Received Bad Pool Service
Before you can fix the problem, you need to identify it. Here are the most common signs that your pool service has been cutting corners:
Symptom What It Means
Cloudy or milky water Poor filtration, imbalanced chemistry, or inadequate chlorine
Green or yellow algae Insufficient chlorine or sanitiser—service is shocking and running
Strong chlorine smell Chloramines (combined chlorine) — means chlorine is being used up but not replenished properly
Stinging eyes / skin irritation pH too low or high, or chloramines present
Scale buildup on tiles or equipment pH or calcium hardness too high
Corrosion or etching on surfaces pH or alkalinity too low—water is aggressive
Frequent equipment failures Chemical imbalance causing corrosion or scaling
Water tests that don't match the service invoice They're claiming to add chemicals they're not actually using
If any of these sound familiar, it's time to take matters into your own hands.
Step 1: Stop the Bleeding
Before you start fixing, you need to stop any ongoing damage.
What to do immediately:
Stop all chemical additions. If you've been adding products based on your service's recommendations, pause. You need a clean slate.
Run your pump continuously. Circulation helps distribute any existing chemicals and prevents stagnation.
Clean your filter. Backwash a sand filter, clean a cartridge filter, or backwash a DE filter. If your pool is cloudy or green, your filter is working overtime.
Clean skimmer and pump baskets. Remove any debris that could be restricting flow.
Do not swim. Until you've rebalanced the water, swimming could cause skin irritation or worse.
Step 2: Get an Accurate Water Test
You can't fix what you don't measure. The first step to rebalancing is getting a reliable, accurate test of your current water chemistry.
What you need to test:
Parameter Ideal Range Why It Matters
pH 7.2 – 7.6 Foundation of all water balance
Free Chlorine 1.0 – 3.0 ppm Your primary sanitiser
Total Alkalinity 80 – 120 ppm Buffers pH against swings
Cyanuric Acid (Stabiliser) 30 – 50 ppm Protects chlorine from UV
Calcium Hardness 200 – 400 ppm Prevents corrosion or scaling
Combined Chlorine (Chloramines) 0 – 0.5 ppm Indicates need for shocking
Phosphates Below 100 ppb Can feed algae if too high
Salt (if saltwater pool) 2,700 – 3,400 ppm Salt cell needs proper levels
How to test:
Test strips: Quick and easy for daily checks.
Liquid drop test kits: More accurate—essential for troubleshooting.
Digital testers: Most precise, especially for saltwater pools.
Action: Visit poolblue.store and choose a reliable test kit. We recommend a liquid drop kit for the most accurate results when rebalancing from a bad service.
Step 3: Diagnose the Underlying Problems
Based on your test results, you can now diagnose what your service was doing wrong.
Test Result Likely Service Failure Solution
CYA > 50–80 ppm Overusing trichlor tablets; never alternating with unstabilised chlorine Partial drain and refill to dilute stabiliser
pH too high (>7.8) Not adding acid regularly Add pH-minus (sodium bisulfate or muriatic acid)
pH too low (<7.2) Overusing acid or shock Add pH-plus (sodium carbonate)
Alkalinity too low (<80) Never checking or adjusting alkalinity Add alkalinity increaser (sodium bicarbonate)
Alkalinity too high (>120) Overcorrecting alkalinity without testing Add acid gradually to lower, aerate to raise pH
Chlorine low or zero Not adding enough sanitiser; inconsistent service Shock heavily, then establish a routine
Chlorine high (>5 ppm) Over-chlorinating without testing Stop adding chlorine; let it drop naturally
Combined chlorine (>0.5 ppm) Not shocking regularly—chloramines building up Perform a heavy shock to oxidise chloramines
Calcium hardness too low (<200) Never checking calcium; using soft water source Add calcium hardness increaser
Calcium hardness too high (>400) Never checking calcium; hard water source Partial drain and refill with soft water
Phosphates high (>100 ppb) Not using phosphate remover; poor sanitation Add phosphate remover to starve algae
Salt too high or too low (saltwater pools) Not monitoring salt levels Add salt or dilute with fresh water
Step 4: Rebalance the Water—In the Right Order
This is the critical step. Adding chemicals in the wrong order can waste product or create new imbalances.
The correct sequence:
Adjust total alkalinity first. This gives your pH a stable foundation. Use alkalinity increaser (baking soda) if low, or acid if high.
Adjust pH second. Now that alkalinity is stable, pH will respond predictably. Use pH-minus if too high, pH-plus if too low.
Adjust calcium hardness (if needed). Add calcium increaser if low. If it's too high, partial drain and refill is the only solution.
Add stabiliser (cyanuric acid) if needed. Only if CYA is below 30 ppm. If it's already high (above 50), skip this—or drain and refill to lower it.
Shock the pool. This oxidises contaminants and breaks down chloramines. Do this in the evening for maximum effectiveness.
Add chlorine (if still low after shock). Establish a routine sanitiser level of 1.0–3.0 ppm.
Add algaecide (if algae was present). This prevents regrowth after shock.
Add phosphate remover (if phosphates are high). This starves algae of its food source.
Step 5: Perform a Heavy Shock
If your service has been neglecting your pool, a standard shock won't cut it. You need a heavy or double shock.
How to heavy shock:
Pool Type Shock Dosage
Residential pool 2–3 times the normal shock dose
Green or cloudy pool 3–4 times the normal shock dose
Saltwater pool Use non-chlorine shock or boost your salt cell to "superchlorinate" mode, then supplement with liquid shock if needed
Steps:
Choose a shock product—calcium hypochlorite (cal-hypo), liquid chlorine, or non-chlorine shock.
Pre-dissolve granular shock in a bucket of pool water (never add dry granules directly).
Pour around the pool perimeter with the pump running.
Shock in the evening or at night to prevent UV degradation.
Run the pump continuously for 24 hours.
Retest in the morning. Chlorine should be high (5–10 ppm). Allow it to drop naturally to 1.0–3.0 ppm before swimming.
Action: Poolblue.store stocks professional-grade shock products with clear dosing instructions. Buy what you need and follow the guide.
Step 6: Clean the Equipment
Bad service doesn't just affect your water—it affects your equipment. Now's the time to give everything a thorough check.
What to clean or inspect:
Equipment What to Check Action
Pump strainer basket Debris buildup Empty and clean
Skimmer basket Cracks or clogs Empty and inspect
Filter (sand, cartridge, DE) Pressure reading, cleanliness Backwash or clean; replace cartridges if needed
Salt cell (saltwater pools) Scale buildup Clean with a mild acid solution or cell cleaner
Return jets Flow direction Adjust for optimal circulation
Pool surfaces Scale, stains, or algae Brush thoroughly; use a stain remover if needed
Pool cover (if applicable) Debris or standing water Clean and drain
Action: Poolblue.store offers filter cleaners, cell cleaners, and scale inhibitors to restore your equipment to peak performance.
Step 7: Establish a New Routine
Bad service is in the past. Now it's time to take control with a simple, consistent routine.
Your new weekly schedule:
Day Task
Daily (or every other day) Skim surface, check skimmer basket
Weekly (same day) Test pH, chlorine, alkalinity, CYA
Weekly (same day) Brush walls and floor
Weekly (as needed) Vacuum
Weekly or bi-weekly Shock the pool (in the evening)
Monthly Check calcium hardness and salt (if applicable)
Monthly Clean or backwash filter
Monthly Inspect all equipment for wear or leaks
Action: Build your maintenance kit from poolblue.store. Our starter bundles include everything you need for a full season—so you never have to rely on a service again.
Why Poolblue.store Is Your Rebalancing Partner
When you've been let down by a bad service, you need a partner you can trust. poolblue.store is that partner.
What we offer:
High-quality test kits – from strips to liquid drop tests to digital meters. Know exactly what's in your water.
Professional-grade chemicals – chlorine, shock, pH adjusters, alkalinity increaser, stabiliser, algaecides, and more.
Clear instructions – every product comes with usage guidelines. No guesswork.
Bulk options – stock up and save, just like a service would—but at a fraction of the cost.
Expert support – not sure what you need? Our team can diagnose your test results and recommend the right products.
Starter bundles – everything you need to transition from bad service to DIY success.
Fast delivery – because when your pool is out of balance, you don't want to wait days for chemicals.
Case Study: When Poolblue.store Saved the Day
"I had a pool service for two years. They charged me $220 a month. When I finally tested the water myself, I found my CYA was over 120 ppm—completely locked up. My chlorine was useless. I had algae blooms every other week. After firing them, I called Poolblue.store. They helped me drain part of the pool, rebalance everything, and set up a weekly routine. Now my water is crystal clear, and I'm saving over $150 a month. I should have done this years ago." — David M.
Final Checklist: Rebalancing Your Pool After Bad Service
Use this checklist to track your progress:
Step Task Completed?
1 Stop all chemical additions; run pump continuously ☐
2 Clean filter, skimmer, and pump baskets ☐
3 Get an accurate water test (test kit from Poolblue.store) ☐
4 Diagnose problems based on test results ☐
5 Adjust alkalinity first, then pH, then calcium ☐
6 Adjust stabiliser (or drain if too high) ☐
7 Perform a heavy shock (evening, pump running) ☐
8 Add algaecide and phosphate remover if needed ☐
9 Retest and confirm all parameters are in range ☐
10 Establish a new weekly DIY routine ☐
Final Verdict: Take Back Control with Poolblue.store
Bad pool service is frustrating, expensive, and avoidable. But the good news is that you can fix it yourself—often better than any service ever did.
With the right test kit, the right chemicals, and a consistent routine, you can enjoy a sparkling, safe pool for a fraction of what you were paying. And poolblue.store is here to support you every step of the way.
Don't trust your pool to anyone else. Visit poolblue.store today and get everything you need to rebalance, restore, and reclaim your pool. Your perfect water is waiting—and you're the one who'll keep it that way.